
Browse the Manifest help
Team pages and profiles
A page for each person behind the shop, with their portrait, role, story, picks and writing, and a Team section that links to them all.

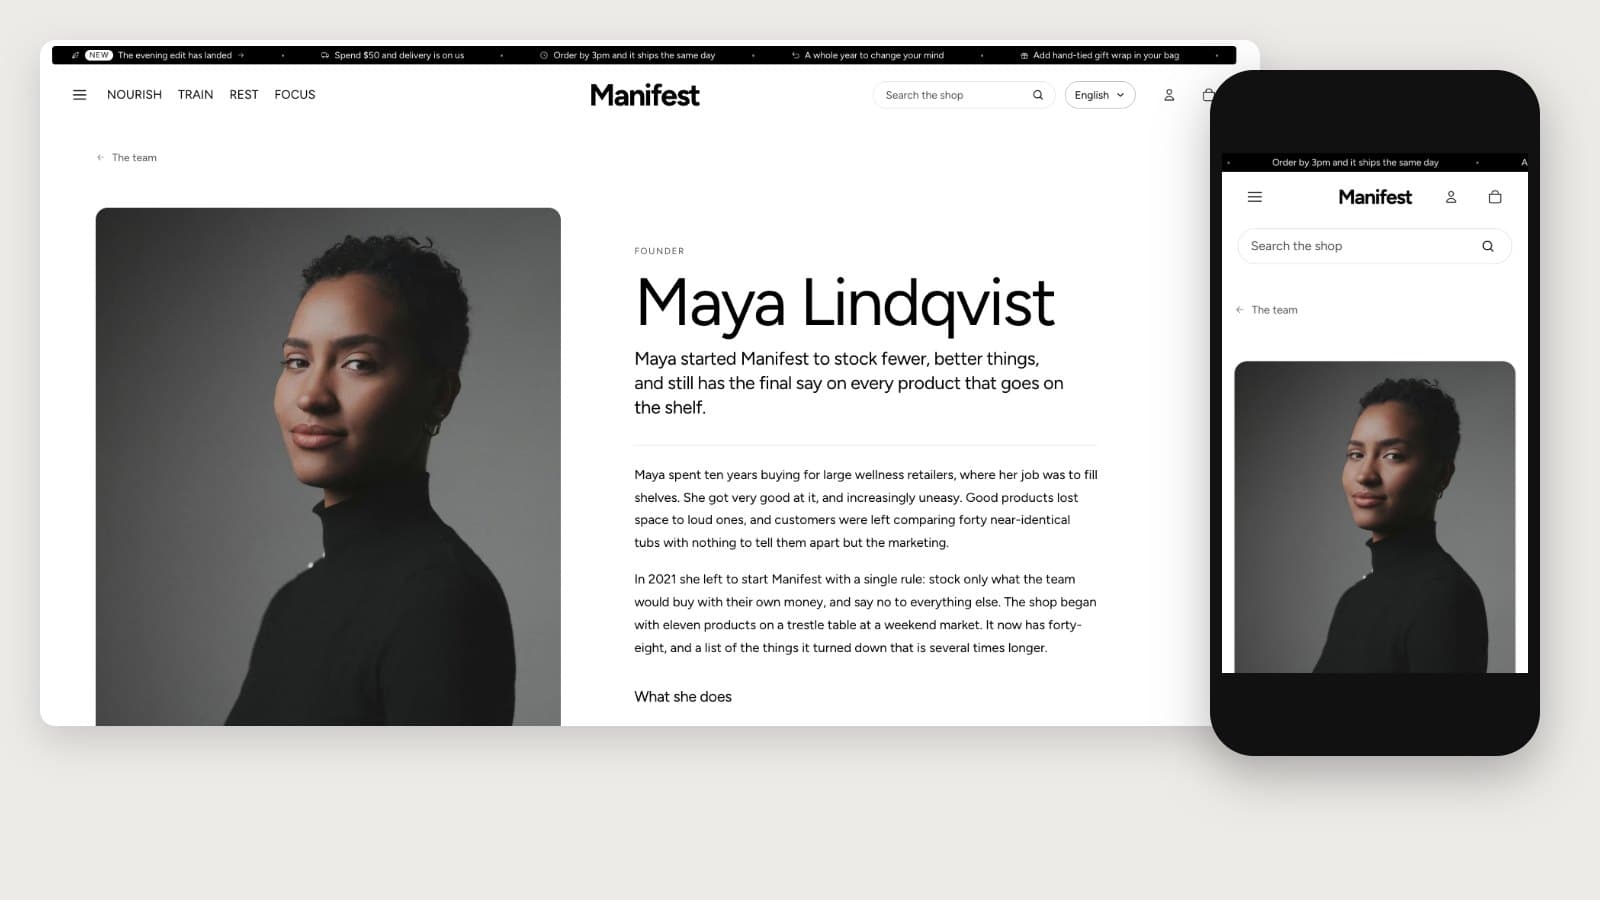
Manifest gives every team member a page of their own on the Profile template. One template serves everyone: each page brings its own portrait, role, introduction and product picks from page metafields, and the page's content becomes their story.
Set it up once
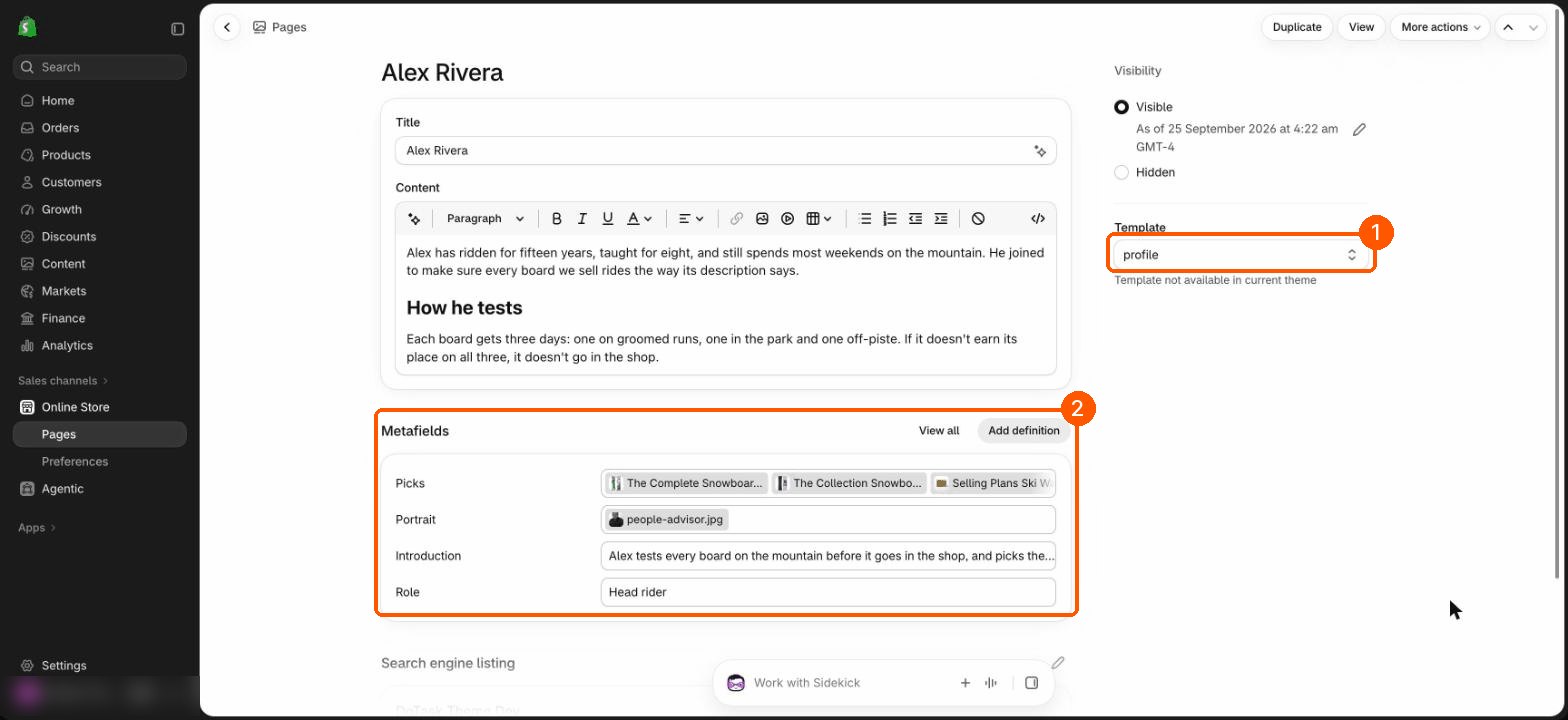
- Create four page fields. In Shopify admin, go to Settings, then Metafields and metaobjects, then Pages, and add: Role (Single line text), Introduction (Multi-line text), Portrait (File, images only) and Picks (Product, set to List). The metafields guide shows each screen.
- Go to Online Store, then Pages, and create a page for the first person. The page title is their name and the content is their story.
- Under Theme template on the right, choose profile. Then fill in the four fields at the foot of the page and save.
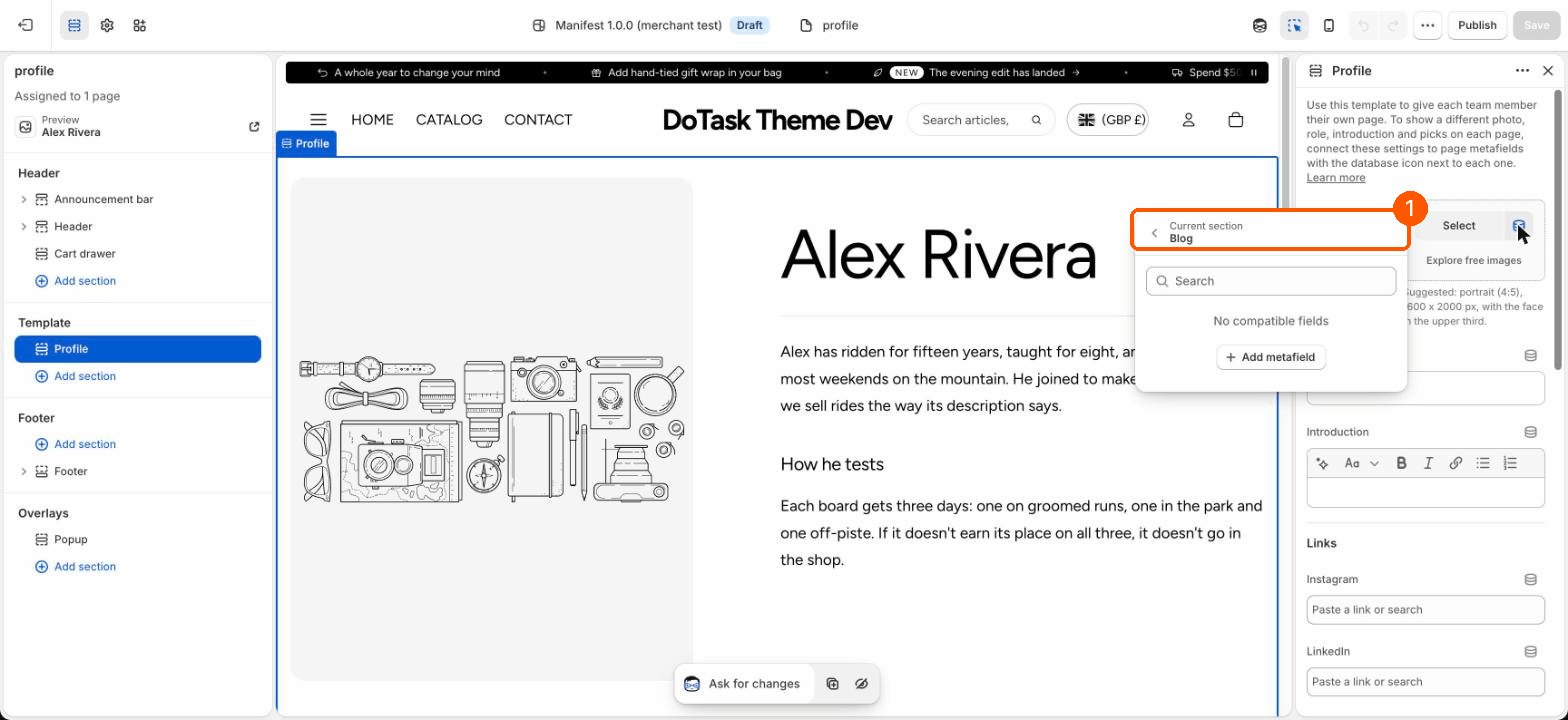
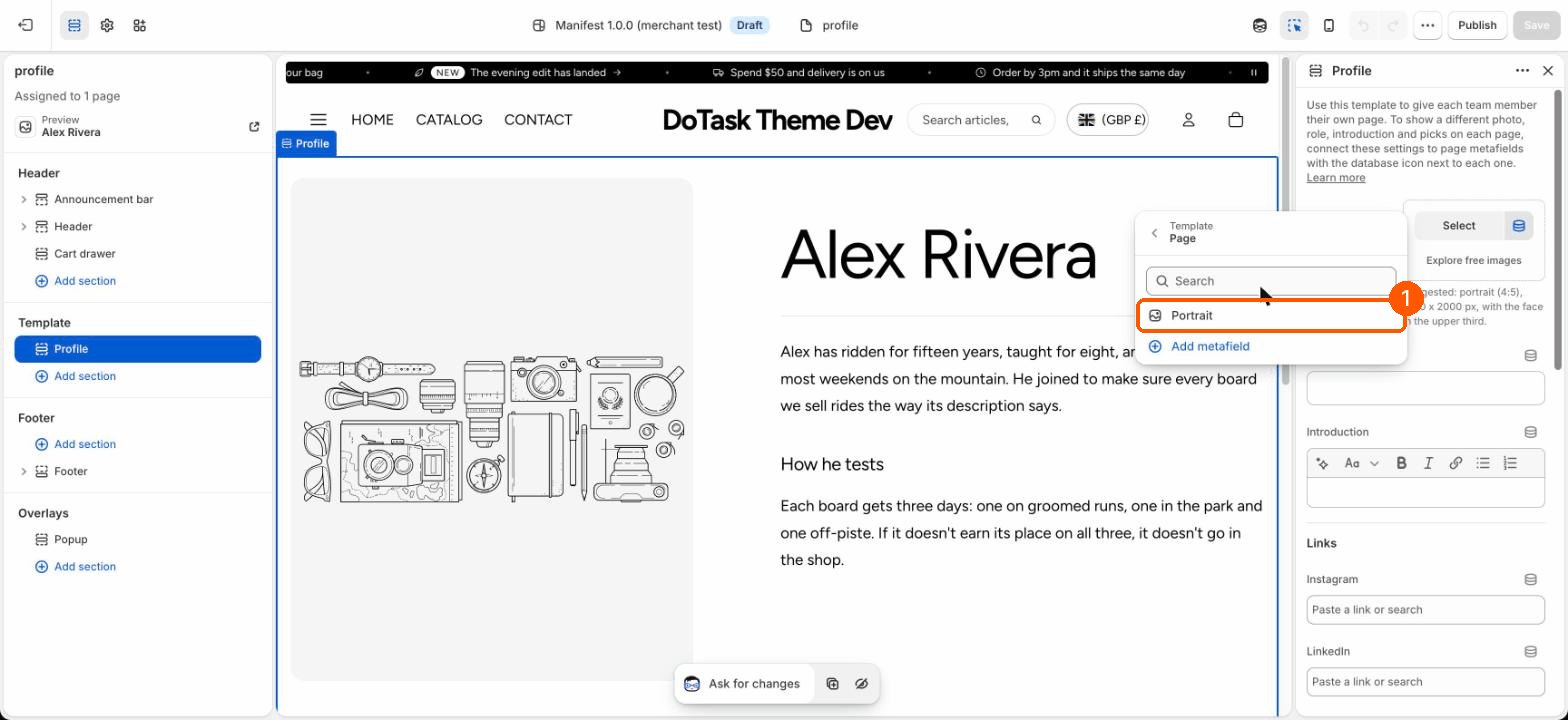
- Open that page in the theme editor and select the Profile section. Until you connect the fields, the page shows a drawing where the portrait goes.
- Click the database icon beside Portrait. The list may open on Blog and say No compatible fields: that's because this section also lets you choose a blog. Click the back arrow at the top of the list.
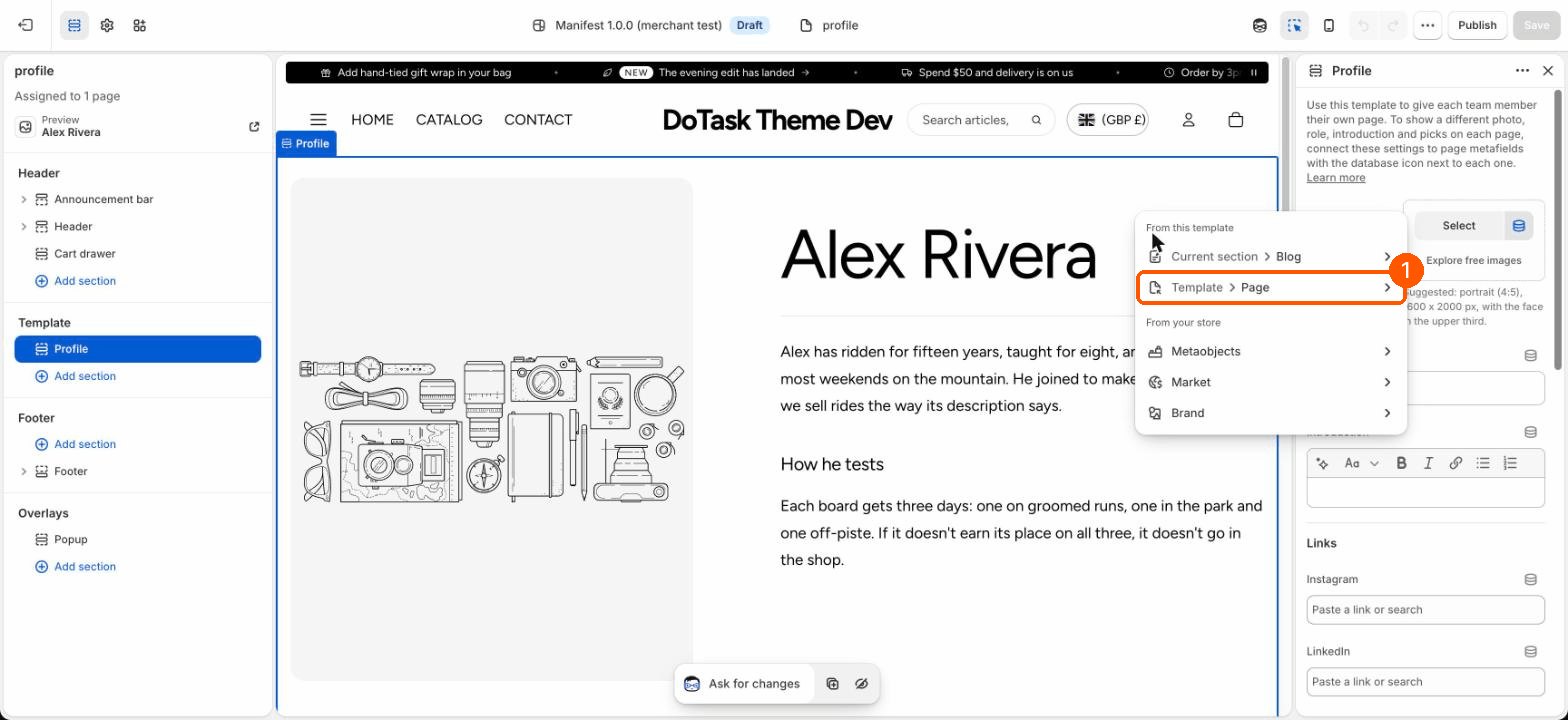
- Choose Template, Page. These are the page's own fields.
- Choose Portrait. The photo appears straight away.
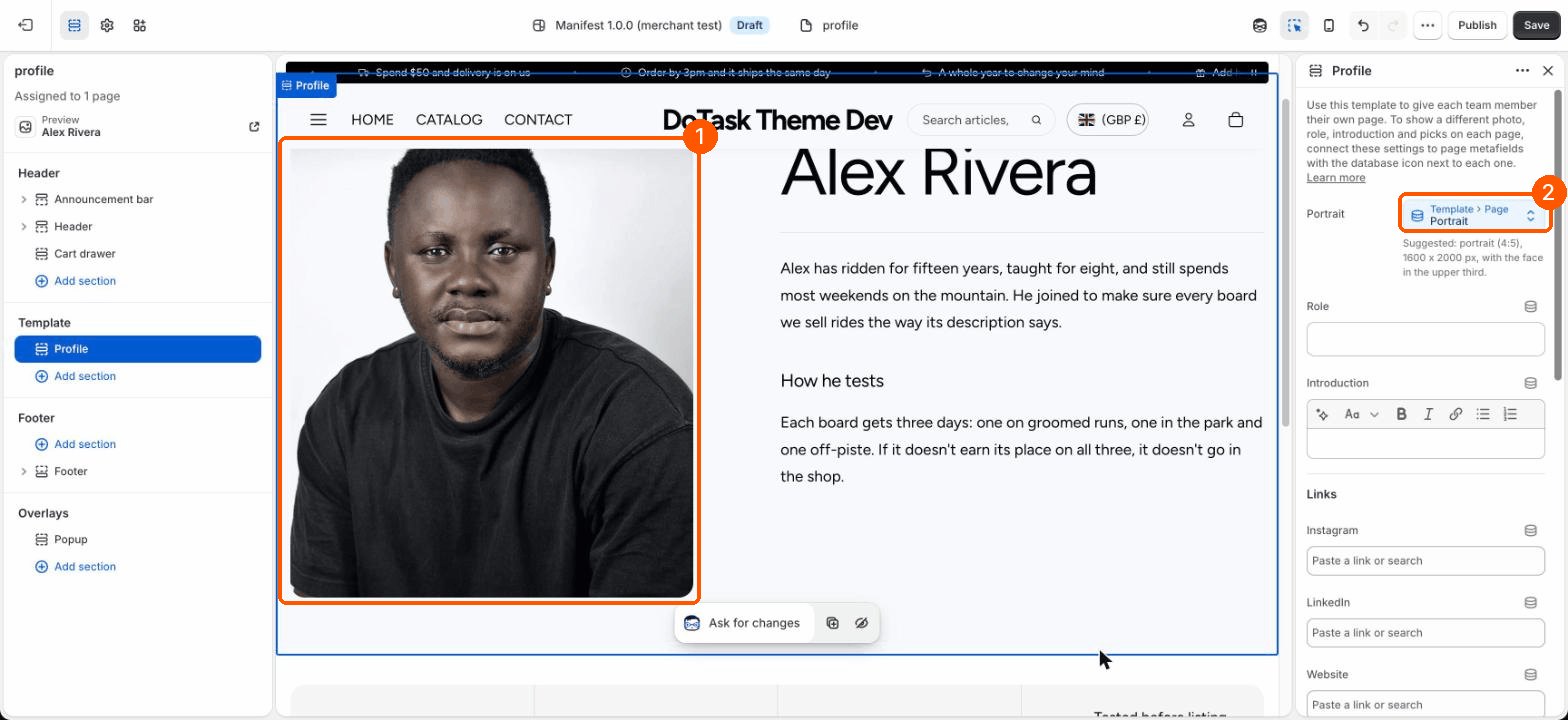
- Do the same for Role, Introduction and Picks, choose the Blog their articles are in, and click Save.
- For everyone else, create a page on the profile template and fill in its fields. There's nothing more to connect: each page shows its own details.
What a profile shows
- The portrait, held beside the words on computers. Suggested: portrait 4:5, 1600 x 2000 px, with the face in the upper third.
- Their role above their name, an introduction, and optional Instagram, LinkedIn and website links.
- Their story: the page's own content, with headings, lists and quotes styled for reading.
- Their picks: up to four product cards. Rename the heading with Picks heading.
- Writing: up to three of their journal articles.
- A back link, such as The team pointing to /pages/about#team.
The Team section
Add Team to any page, usually your About page, and add a Team member block for each person. Choose their profile page, portrait and role; the name comes from the page title unless you type another. The whole portrait opens their page. Set 2, 3 or 4 columns on large screens, and give the section a Link name for Page tabs so a tab can jump to it.
The Team heading takes alignment, bold and italic, highlighted words in [square brackets], its own Heading color and Text color, and the Typewriter effect. Heading alignment starts at Heading left, text right. See Showing collections and products, under Section headings.
Linking from elsewhere
- People cards: set a card's Button link to the person's profile page.
- Journal articles: an Author block links each byline and author box to the writer's page. See The journal and articles.