
Browse the Manifest help
Make new blocks with Sidekick (Flexible section)
Describe a block that Manifest doesn't have and Sidekick writes it for you. Where you can add one, what you need, prompts that match Manifest's look, and how to remove one.

Sometimes you want something the theme doesn't have: three reasons to buy with an icon each, a small pricing table, a quote with a signature. Sidekick can write a new block from your description, and Manifest gives it a home that already matches your store: the Flexible section.
Before you start
- Plan: any plan except Starter. Free trials work.
- Theme: a purchased copy of Manifest. Trial copies from the Theme Store can't make blocks.
- Staff: the store owner, an administrator, or staff with the Edit code permission.
- In the theme editor.
Where new blocks can go
- Flexible section: add it anywhere from Add section. It starts with a small label, a heading, some text and a button, and takes Manifest's Text, Button, Image and Group blocks, blocks you generate, and app blocks.
- Generated blocks: when you ask Sidekick to make a block in a new section, Shopify puts it in this section for you. It has the same settings as Flexible section.
- Group blocks inside either of them, to put a generated block in a column or a row with others.
Manifest's other sections keep their own blocks, so their layout stays reliable. To put a new block between them, add a Flexible section right there.
Make a block
- In the theme editor, click Add section and choose Flexible section. (Or ask Sidekick: "Add the theme's Flexible section under the hero. Don't generate code.")
- Under it in the list on the left, click Add block. Generate is at the top, above Manifest's own blocks.
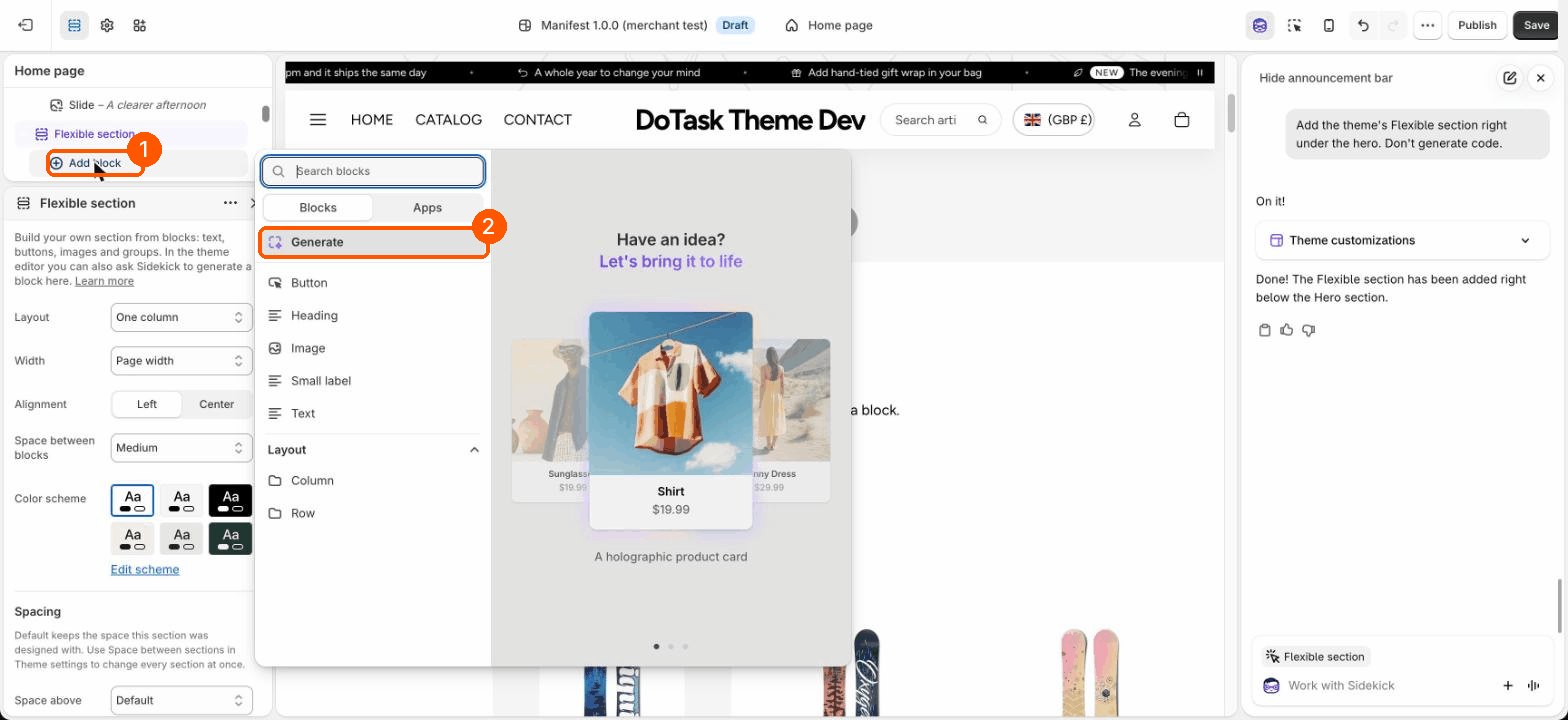
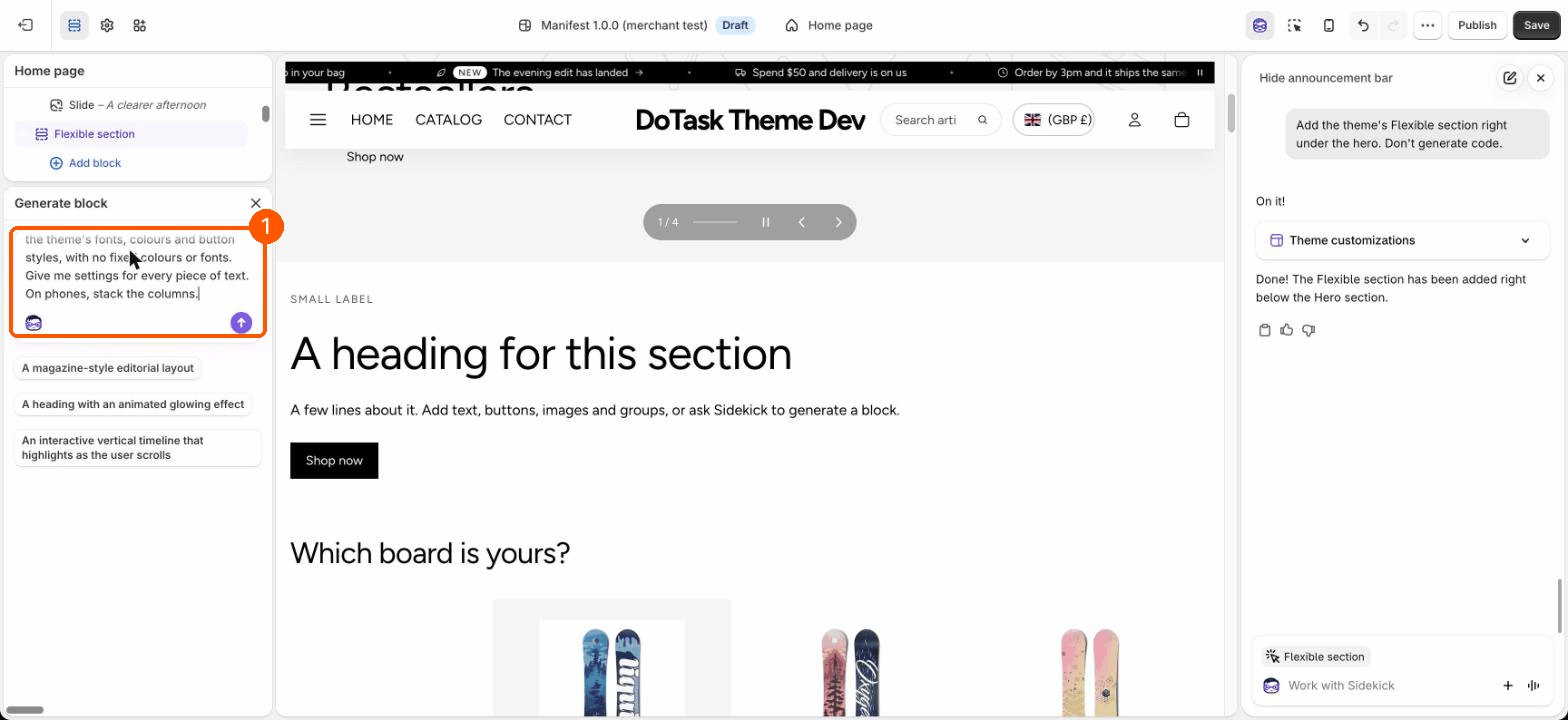
- Describe the block in the box, Describe what you want to build (at least five words; more detail is better). Start from a prompt below. Then click the arrow.
- Wait about half a minute. The panel shows the code being written, and a glowing box marks where the block will go.
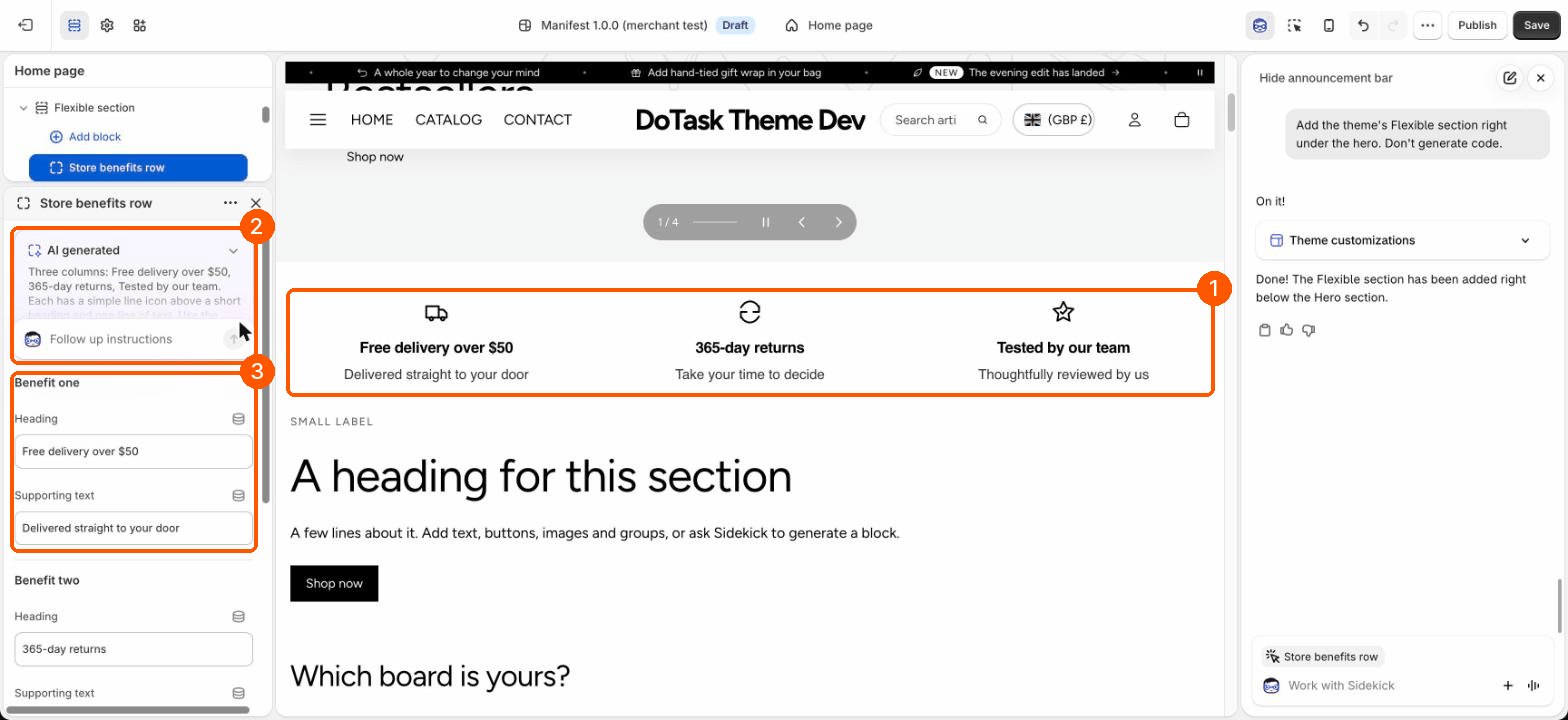
- The block appears, selected, with a setting for each piece of text. Change the words in its settings.
- Not quite right? Type a change into Follow up instructions, such as "make the icons smaller".
- Click Save to keep it. Until you save, the block isn't in your theme at all: leave without saving and it's gone.
Make it look like Manifest
Add these to any block prompt, so the new block uses your fonts, colors and buttons, and changes with them:
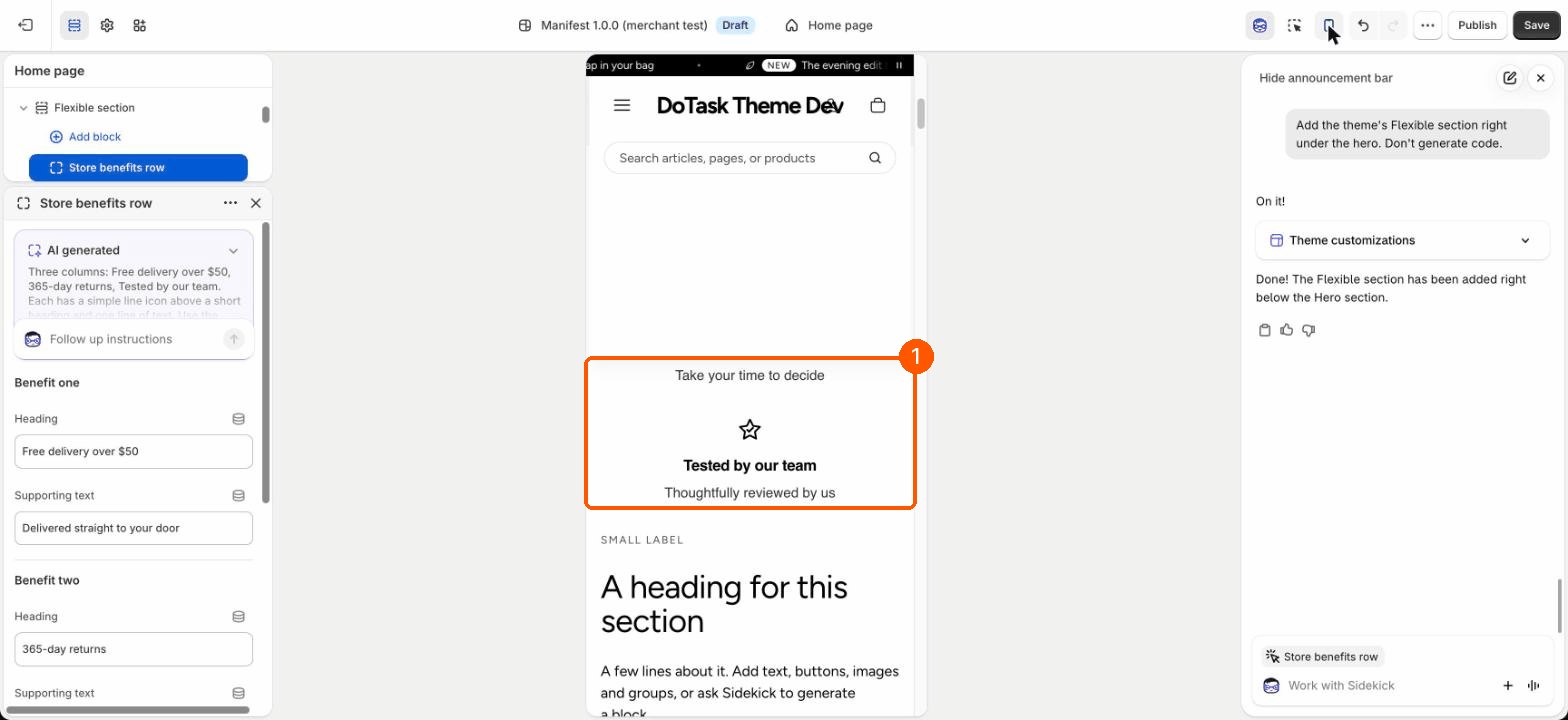
Use the theme's fonts, colors and button styles, with no fixed colors or fonts. Give me settings for every piece of text, image and link. On phones, stack everything in one column.
Example blocks
Three columns side by side: Free delivery over $50, 365-day returns, Tested by our team. Each has a simple line icon above a short heading and one line of text.
A customer quote in large text, with the customer's first name, their town and a five-star rating underneath.
A simple two-column table comparing Subscribe and save with One-off purchase: price per month, delivery, and whether you can pause or cancel.
A small signature block: a handwritten-style signature image, the founder's name and role, and one line about why they started the shop.
Set up the section around it
- Layout: One column, or Two columns on computers, to put a block beside an image or text.
- Width: Page width, or Narrow, for reading.
- Alignment: left or centered.
- Space between blocks: small, medium or large.
- Color scheme, Space above and Space below, as on every Manifest section.
Manifest's own blocks for building around it: Text (Heading, Subheading, Normal text, Smaller and lighter, Small capital letters), Button (Filled or Outline), Image (Portrait, Square, Landscape or Same as the image) and Group (a Column or a Row that wraps on phones).
Check before you publish
- Look at it on a phone: the phone button at the top of the editor.
- Try it with each color scheme you use, especially dark ones.
- Tab through it with the keyboard, and give every picture its alt text.
- Shopify says generated code can have mistakes or miss accessibility and speed best practices. Ask Sidekick to fix what you find, or remove the block.
Remove a block you made
Taking the block out of a section hides it. To delete it from the theme altogether:
- In the theme editor, select the block, click the … menu in its settings, and choose Edit code.
- In the blocks folder, find the block's file and click its Delete icon. Confirm.