
Browse the Manifest help
The journal and articles
Set up the journal page's lead story and topics, the article layout with author bylines, a contents list, products and a newsletter signup, and write articles that read well.

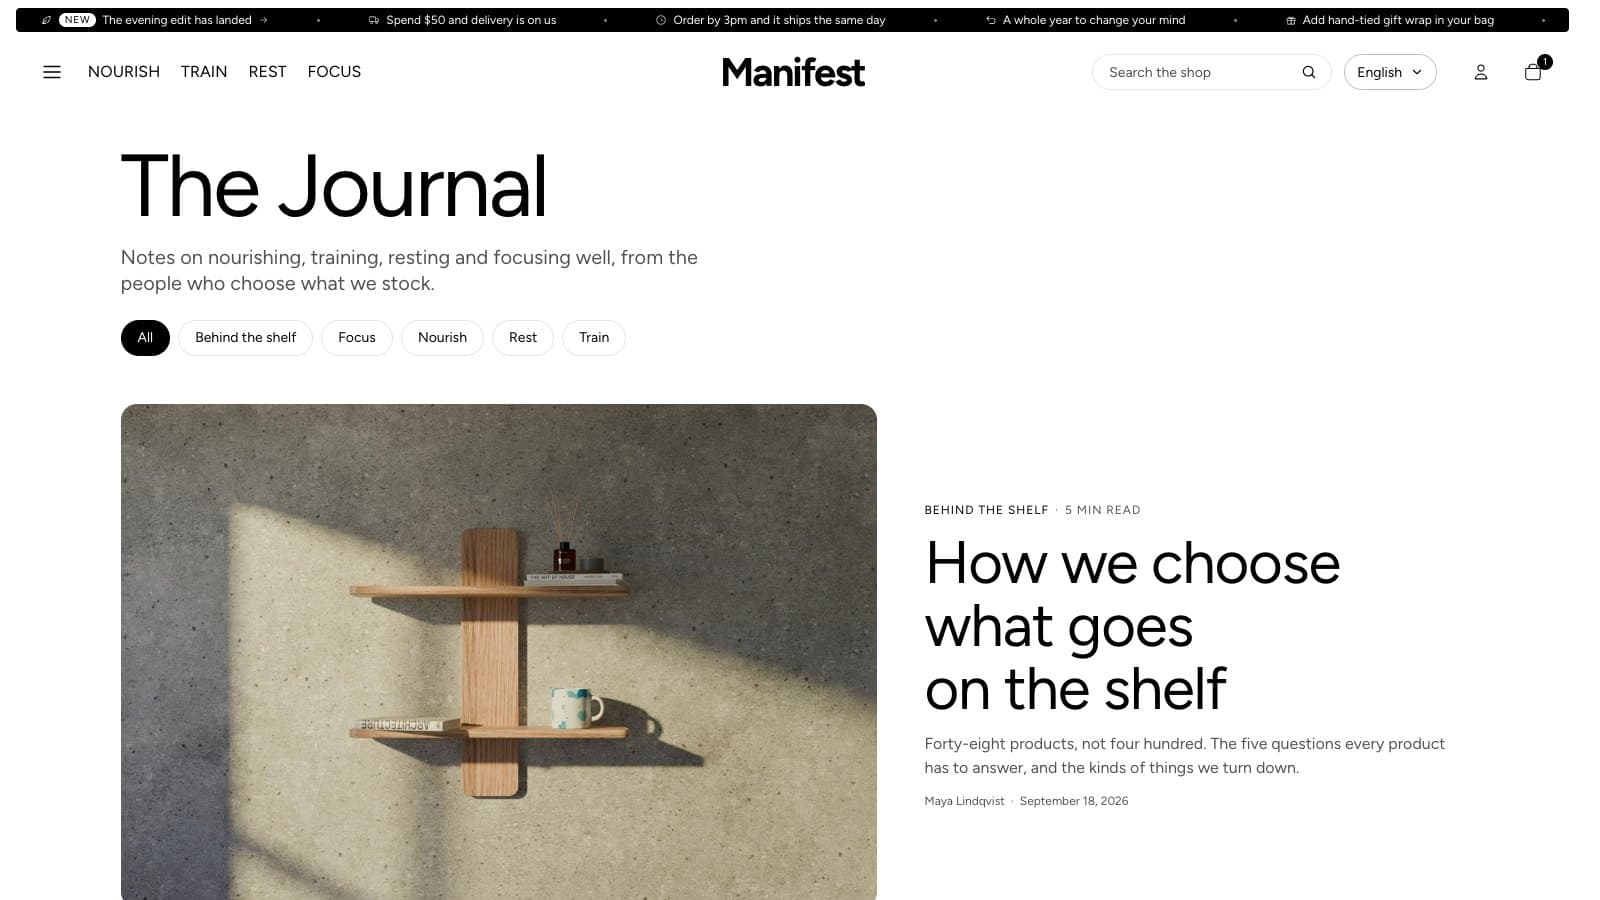
The journal page
Open the page picker in the theme editor and choose Blogs. The Blog section has these settings:
- Text: a line of introduction under the journal's title.
- Show topics: filter buttons made from your articles' tags (up to twelve), with All to clear them.
- Feature the latest article: the newest article shown large at the top of the first page.
- Articles per page (3–24), with Newer and Older links when there are more.
- Show breadcrumbs and Color scheme.
The article page
- The topic sits above the title, and the article's Excerpt (in the article editor) becomes the lead line under it and the text on its card.
- The byline shows the author, the date and a reading time worked out from the article's length. A thin bar along the top of the window fills as the reader scrolls.
- The article's image runs wide under the heading. Suggested: landscape 16:9, 2400 x 1350 px.
- Tags and a Share button sit at the foot, followed by the author box and Keep reading: three more articles, from the same topic first. Turn these off with Show related articles at the end.
- Comments appear when they are switched on for the blog in Online Store → Blog posts → Manage blogs.
In this article
When an article has three or more Heading 2 headings, a list of them appears as In this article. On wide screens it stays beside the text as the reader scrolls and marks the part they are reading. On phones it sits above the text, closed, and opens with a tap. To turn it off, open a blog post in the theme editor, select the Article section and turn off Show contents list.
Next article
Show next article adds a link at the end to the next older article. After the oldest one, it links to the newer one instead. It is on to start with; turn it off in the Article section.
Products in this article
Show the products an article mentions as product cards after the text, ready to add to the cart.
- In the theme editor, open a blog post, select the Article section and click Add block. Choose Products in this article.
- Under Products, choose up to four products. Leave Heading empty to use Products in this article.
- Click Save.
Products you choose here show on every article. To show different products on each article, create an article metafield that holds a list of products (Settings → Metafields and metaobjects → Blog posts, type Product, set to List). Fill it in on each article. Then click the database icon beside Products and choose that field. See Show different details on each product.
Newsletter signup
Add the Newsletter signup block to the Article section to ask readers to sign up at the end of each article, after the author box. Write your own Heading, Text and Button label, or leave Heading empty to use New articles by email. The block has its own Color scheme. People who sign up are added to Customers in Shopify, with the tag newsletter.
Authors
- In the theme editor, open a blog post and select the Article section.
- Add an Author block for each writer. Type their Name exactly as it appears as the article's author.
- Add a square portrait (800 x 800 px), their role, a short bio and their profile page.
- Choose the Author box color scheme. Every article by that writer now shows their portrait in the byline and an author box that links to their page.
Writing an article that reads well
- Use Heading 2 for each part of the article and Heading 3 inside it. Keep paragraphs short.
- The first paragraph is set a little larger, so make it the one that draws the reader in.
- A Blockquote becomes a pull quote: use one or two for the line you most want remembered.
- Lists, tables and images all have their own styles; images run the full width of the column.
- Link to the products you mention, so readers can find them.