
Browse the Manifest help
Show different details on each product (metafields)
Give each product its own badges, facts, icons, care guide or size chart from one template. Step by step, with screenshots, and when you don't need it at all.

Most of Manifest works by typing into the theme editor. That text is the same on every product, which is fine for things like your delivery promise. When a detail changes from product to product (Vegan on one, not another; a different size chart; a care guide), you store it on the product itself in a metafield, and tell the theme editor to read it from there.
It takes about ten minutes the first time. You'll do three things: create the field, fill it in on your products, and connect it in the theme editor. Sidekick can do the typing for you: see Set up products and pages with Sidekick.
Step 1: Create the field
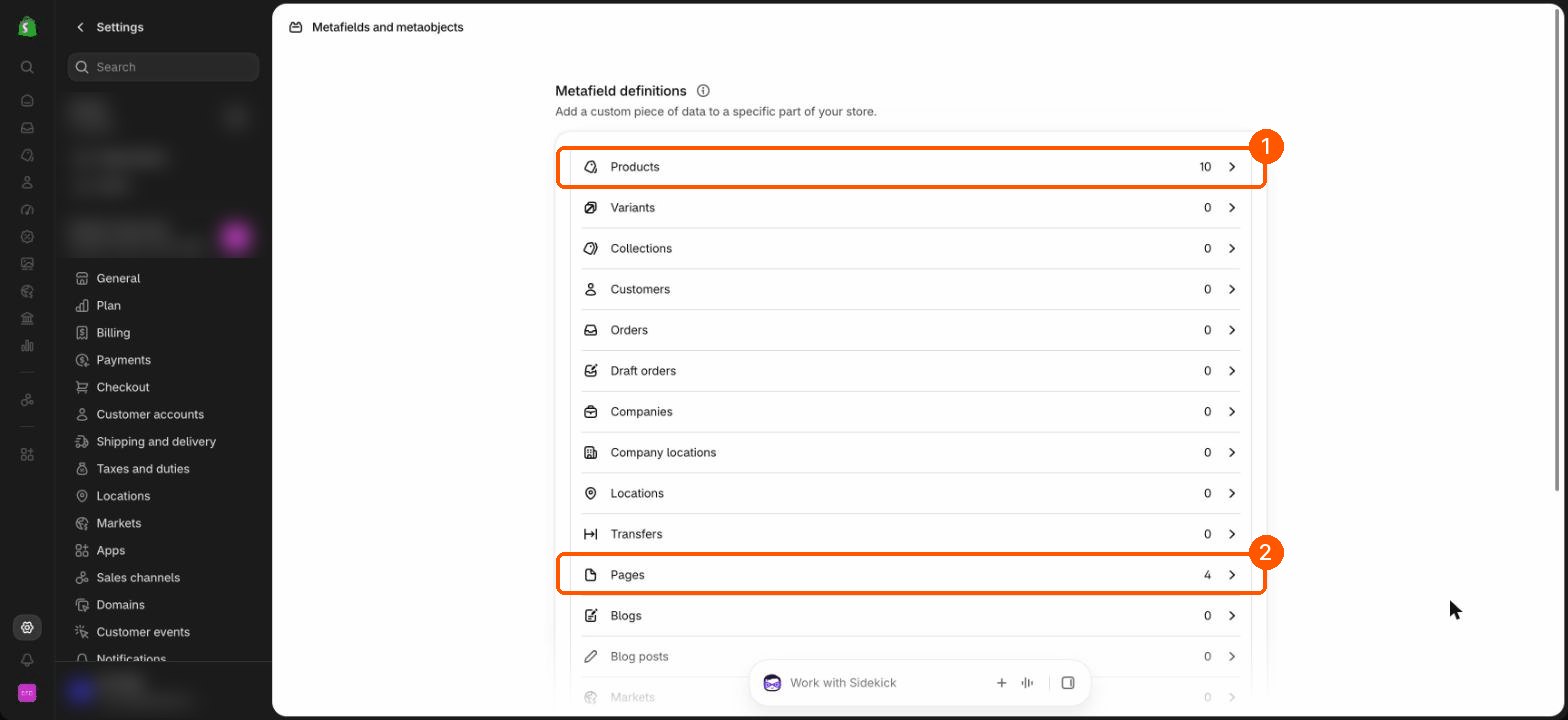
- In your Shopify admin, go to Settings, then Metafields and metaobjects.
- Choose Products (or Pages, for team pages).
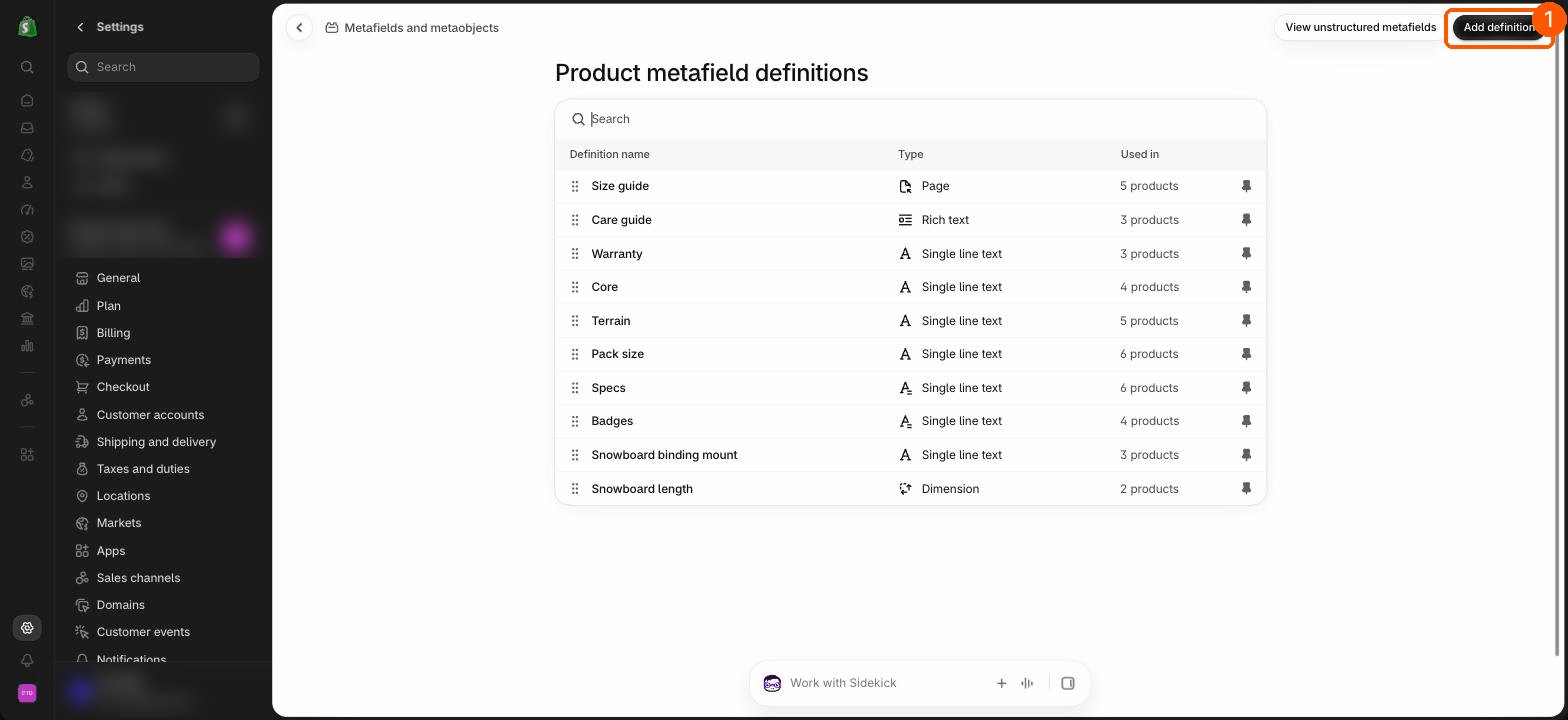
- Click Add definition in the top corner.
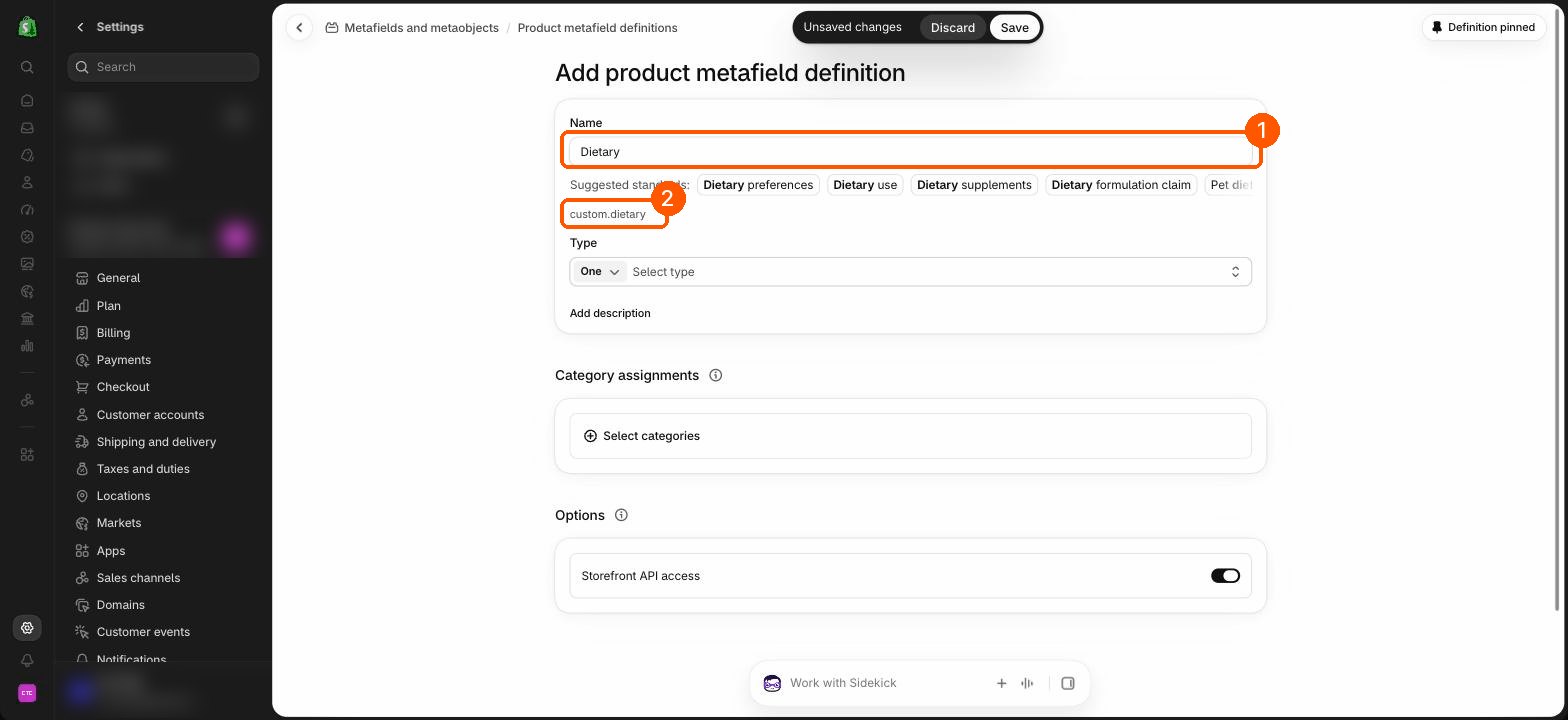
- Type a name people will understand, such as Dietary. Shopify shows the field's key underneath, such as custom.dietary. You only need the key for a Comparison table row.
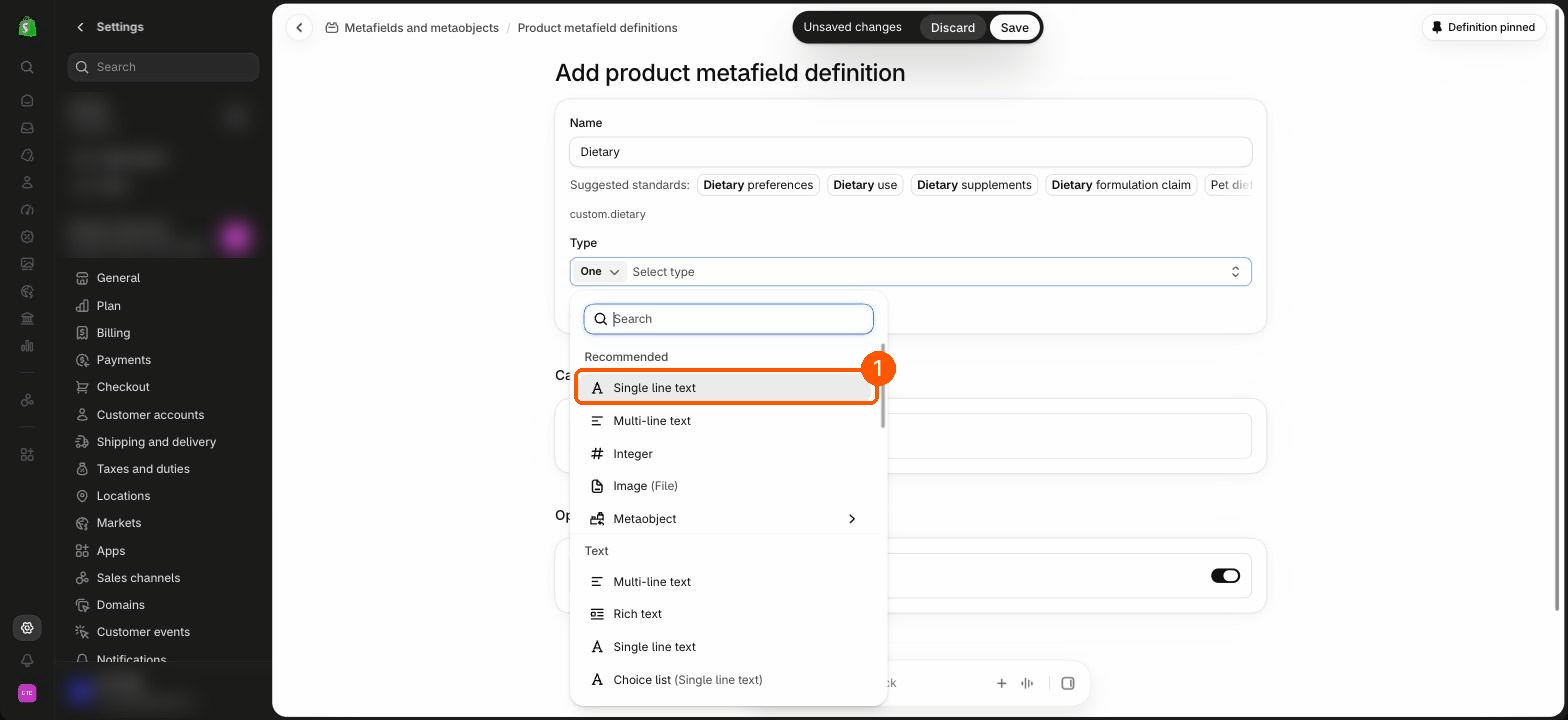
- Under Type, pick what kind of detail it is. For a short line of text, choose Single line text. For a longer text with paragraphs, choose Rich text. For a page, such as a size guide, choose Page.
- Click Save.
Step 2: Fill it in on each product
- Open a product in Products.
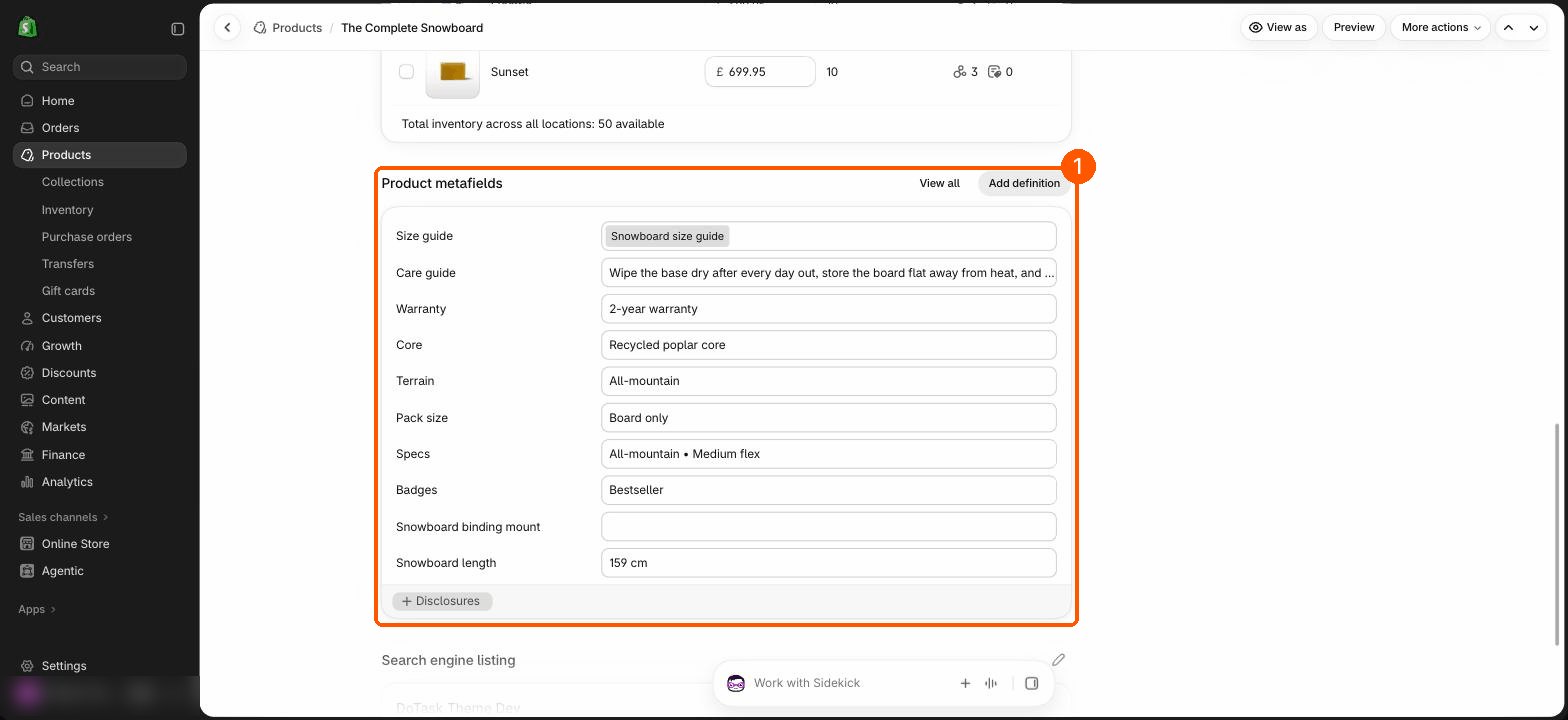
- Scroll to Product metafields near the bottom. Your new field is there. Type the value for this product, such as Vegan, and save.
- Leave it empty on products it doesn't apply to.
Step 3: Connect it in the theme editor
You do this once. Every product using the template then shows its own value.
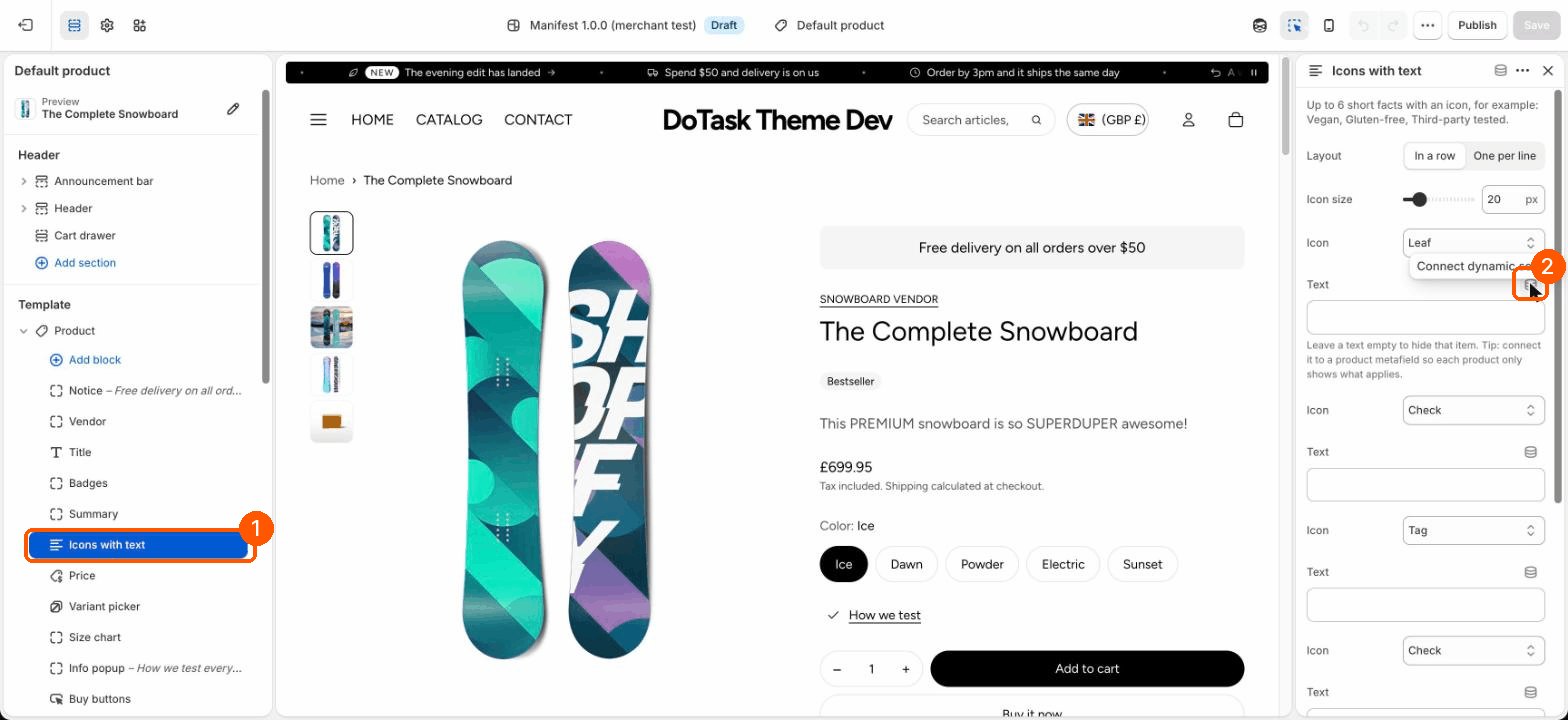
- Open the theme editor on a product page. In the left panel, open Product and select the block, such as Icons with text.
- Next to the setting, click the small database icon.
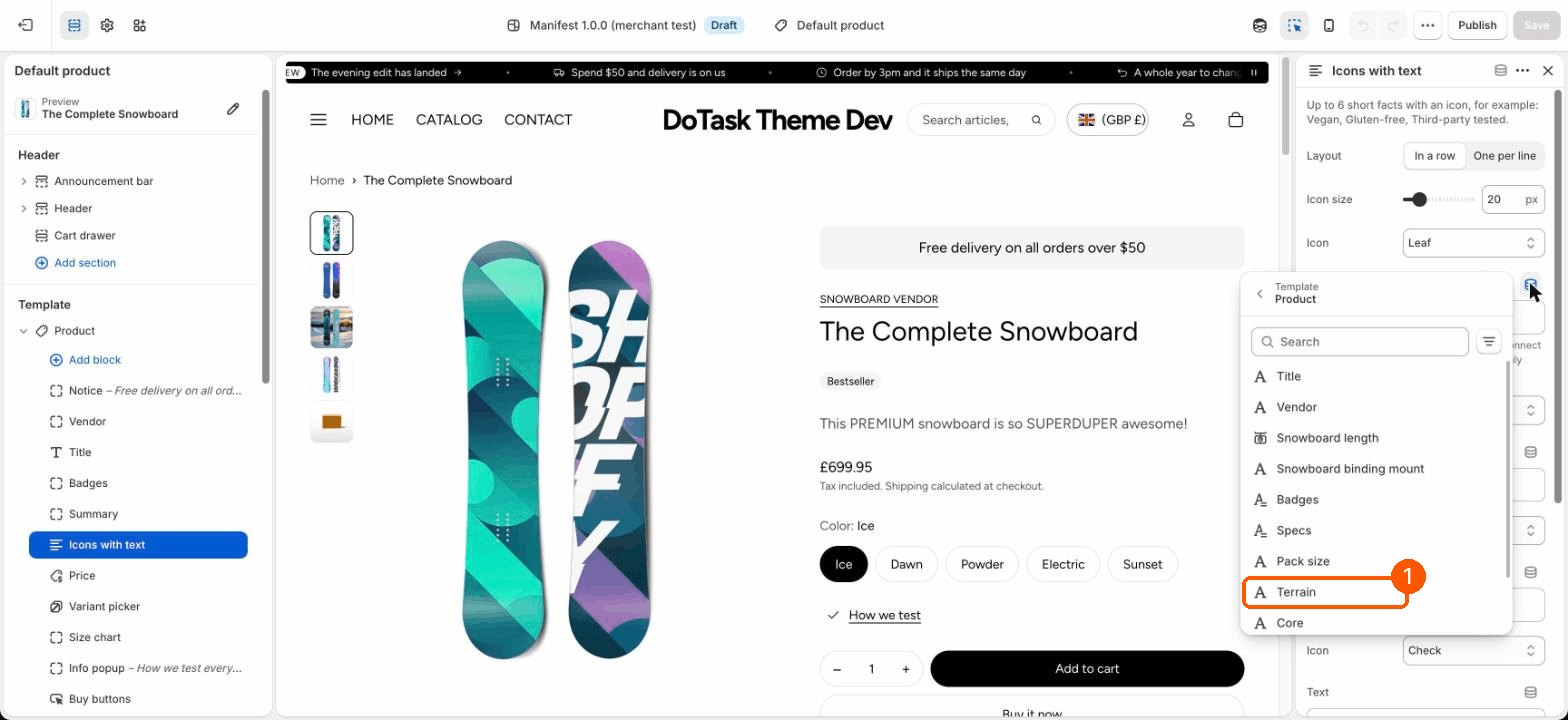
- Pick your field from the list, such as Terrain.
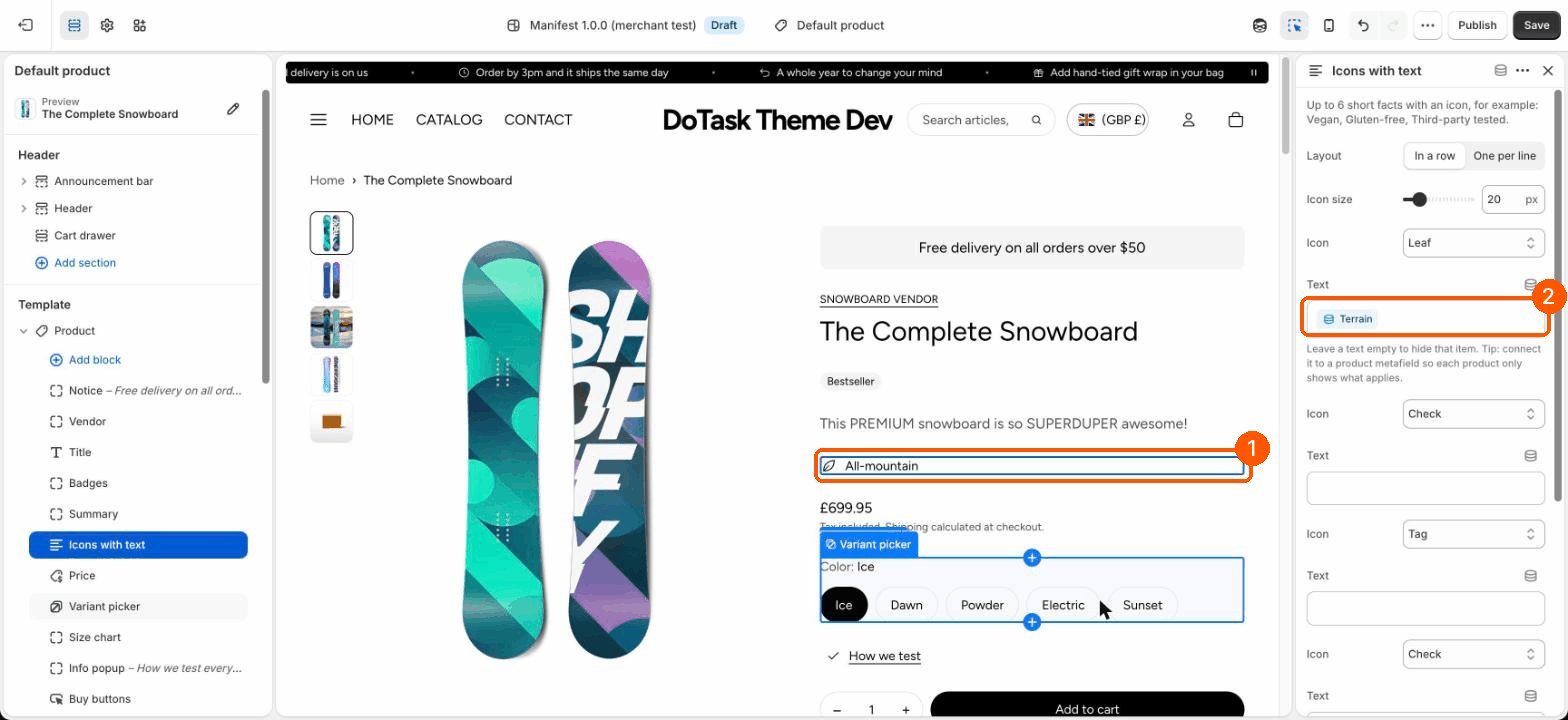
- The preview shows this product's value straight away. Click Save.
Three fields Manifest reads by itself
These need no connecting: create them and fill them in, and they appear. Name them exactly as below so their keys match.
- Badges: key custom.badges, type Single line text set to List. Shows your own badges, such as Bestseller, on product cards and in the product page's Badges block. Tags that start with badge:, such as badge:New, still work too.
- Specs: key custom.specs, type Single line text set to List. Short facts, such as All-mountain, on product cards (turn on Show specs and pack size in Theme settings, Product cards) and in Range tabs.
- Pack size: key custom.pack_size, type Single line text. Such as 60 capsules, after the price on product cards.
Good places to connect
- Subtitle block: reads Shopify's standard Product subtitle field by itself. Connect it only to use your own field instead.
- Icons with text: one Single line text field per line, such as Dietary and Testing.
- Tabs and accordion content: Rich text fields, such as How to use or Ingredients.
- Size chart and Info popup: a Page field, so each product opens its own page. See Size charts.
- Notice and Trust badges: text fields for per-product delivery messages.
- Team pages: Page fields for the portrait, role, introduction and picks. See Team pages and profiles.
- Comparison table rows: set Where the values come from to Product metafield and type the key, such as custom.pack_size.
Which settings accept which fields
- Text settings: single line text, numbers, dates, measurements, ratings and money.
- Rich text settings: all of the above plus multi-line and rich text.
- Image settings: a File field set to images. Video settings: a File field set to videos.
- Link settings: URL. Color settings: Color.
- Product, collection and page pickers: a Product, Collection or Page reference.